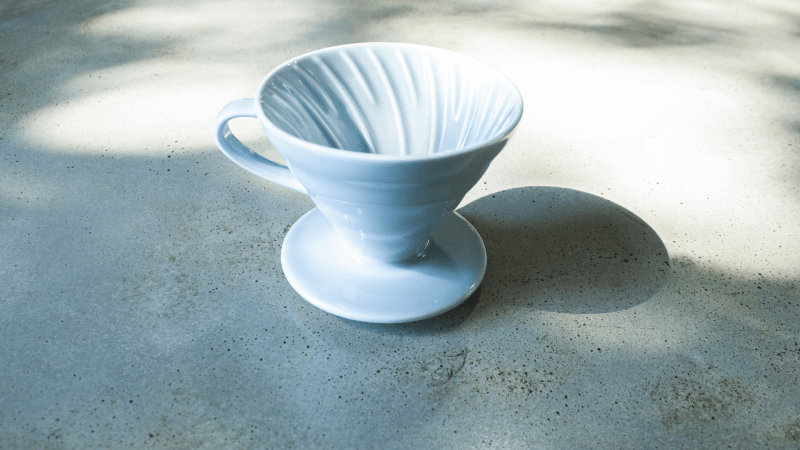
The Hario V-60 dripper is quick and easy to use, can be cleaned effortlessly, and brews great-tasting coffee. Here are some tips on how to get the most out of it.
About the Dripper
The dripper first appeared at the beginning of the last century, hundreds of years after coffee was first discovered. It’s used for what is known as ‘pour-over’ coffee, which is not only delicious, but quick and ridiculously easy to brew. This brewing system is perfect for tasting specialty coffees or for those from individual origins, as it brings out the beans’ more subtle flavours. Moreover, considering the results it produces, this filter holder is very inexpensive.
The Hario V60-02 dripper must be used with Hario V-60 filters. This filter holder allows you to make up to 240 millilitres of coffee at a time in under two minutes, and is made of ceramic, a material that effectively keeps the liquid warmth.
One of the most popular manual brewing methods among baristas, this filter holder can be used along with a myriad of accessories. For example, there is the dripper stand, scales made specifically for drip brewing, filters of all kinds... And most importantly, since the consumer has complete control over the brewing process, it becomes very easy to play around with the dripper, like by changing the grind, the brewing time, the quantity of coffee, etc. Once you fall in love with this brewing method, a whole new world of possibilities opens up!
Flavour Profile
You should choose a filter grind (coarse) for this brewing system, even with the filter, as the coffee and water are in contact for quite some time. With just one hole at the bottom, the filter holder is great for regulating flow, while brewing the coffee more delicately.
The dripper, whether a Hario or another brand, will always produce a tasty coffee, since the water and the coffee are in contact for a long time. This means that the beans’ qualities, as well as their defects will be highlighted once brewed. As mentioned above, this is great if you want to test your coffee’s origins.
There’s virtually no blend that can’t be used with the dripper. The resulting flavour profile will be determined primarily by the choice of coffee, along with other variables, including the amount of coffee used and the grind of the beans.
How to Use the Hario V-60 Infuser
You can easily find the right coffee and water weight ratios if you work with a scale, which offers maximum precision. You can also put your cup and dripper on a scale and perform all the steps by weight rather than the ingredients’ volume.
-
Place the dripper on a clear cup (to watch out for overflow) with a minimum capacity of 12 oz.
-
Fold the corner of the paper filter cone before placing it in the dripper.
-
Boil 2 cups of water, then pour into a teapot or container with a fine spout. This shape will be very useful for the next steps.
-
Once the water has cooled to 95°C, wet the filter and empty the cup of any water.
-
Place 2 to 3 level tablespoons of coarsely ground coffee in the filter and make a small depression in the center of the coffee. Note that the grind, the amount of coffee used, and the roasting profile will determine the resulting flavour profile.
-
Gently pour a small amount of hot water into the center, making small circles towards the outside, until the coffee’s entire surface is covered with liquid.
-
Wait 20 to 30 seconds. This step, which is designed to release the coffee’s gases, is called blooming.




Share:
What is Monsoon Malabar Coffee?
How to Make Latte Foam